Getting started with Google Shopping Ads is a bit more complicated than with standard Google Text ads. There are more steps and more things that you can potentially do incorrectly – it can be quite frustrating!
Step 1 – Upload all of your products to your store – with high quality images and descriptive names!
Step 2 – Complete a page that shows your contact details and return policy
Step 3 – Register with Google Ads
Step 4 – Register with Google Merchant Center
Step 5 – Create your Shopping Feed
Step 6 – Add your Shopping Feed to the Merchant Center
Step 7 – Create your first Shopping Ads campaign in Google Ads
Although there are many steps in the whole setup process, arguably the most tedious and difficult part is sorting out your shopping ads feed.
If you are using WordPress with the WooCommerce plugin for your online shop, then there are several plugins available to automate your feed – or you can use a Google Sheet.
Using a Plugin to Create a Google Ads Feed
Always backup your website and research plugins for security risks etc before installing and activating them.
To get started, search for, install and activate the
WooCommerce Product Feed Manager plugin.
Once installed it should appear in the left hand menu – usually near the top. Click the product feed icon/text and then click “Add New Feed”:
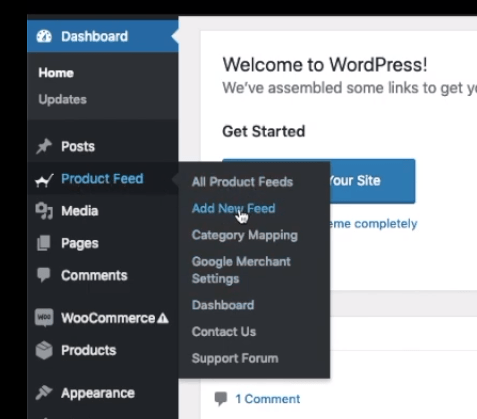
WP Admin – Product Feed>Add New Feed
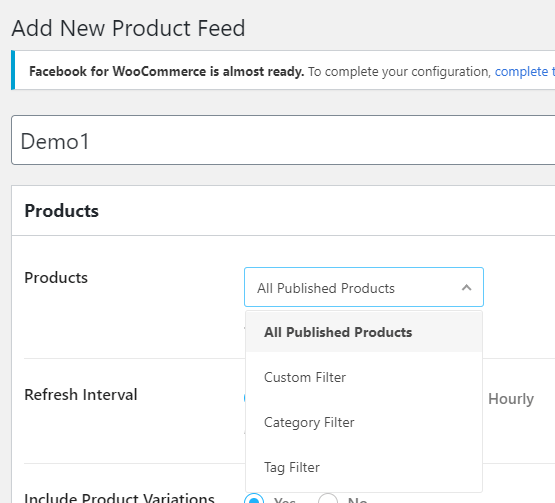
Next give the feed a name – “Demo1” in this example and then in the “Products” section just below, choose whether you want the feed to pull in All Products are just a section or subcategory of your products.
If you wish to separate your feeds by product category for example, click the drop down menu and then click on “Category Filter”.
If for example, you only want to advertise a certain sub-section of products, you could put these in a specific category or give them a specific tag, to make filtering your feed easier.
Fill in the “Product” options
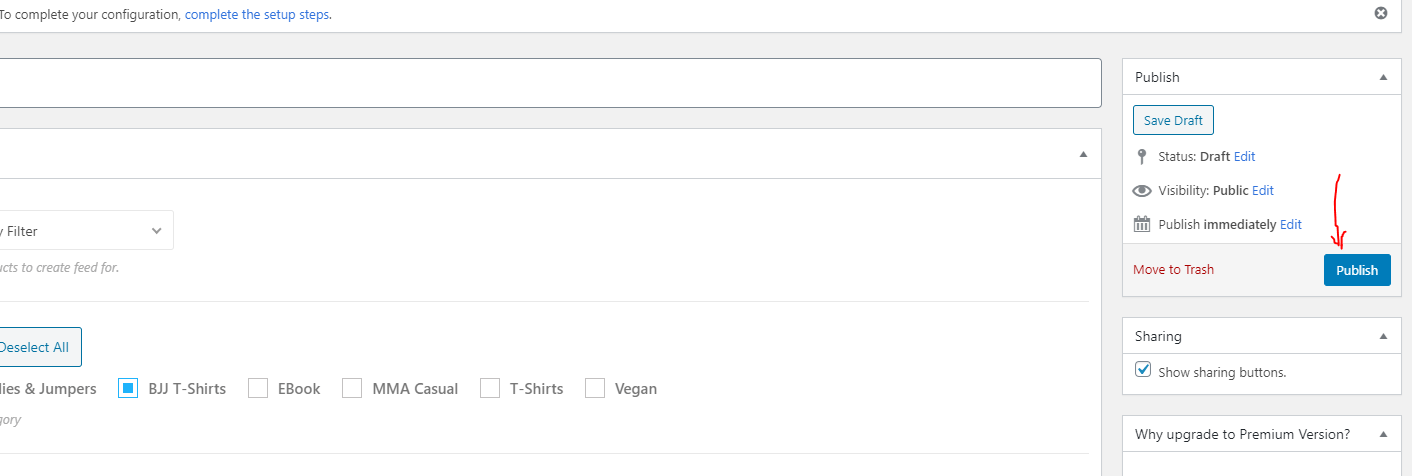
I have chosen only to add a specific Category to my feed – Brazilian Jiu Jitsu T-Shirts or “BJJ T-Shirts”. To do this I have chosen “Category Filter” from the first drop down menu.
In order to refresh the feed automatically I have selected the “No Interval” button in the Refresh Interval section, I have chosen to include product variations – e.g. size and colour and to include the parent product.
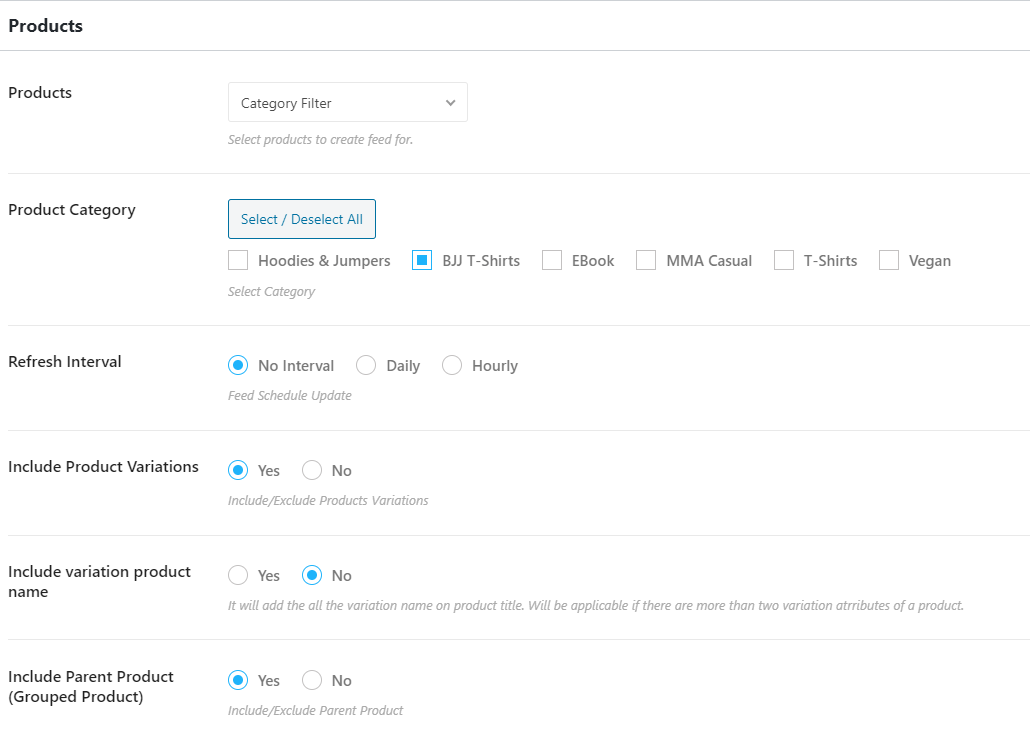
Select the relevant ‘Products’ options
Choose “Feed Configuration” Options
On the Merchant Type drop-down menu, select “Google Shopping” – to be presented with the options required to populate the Google Shopping Ads feed correctly.
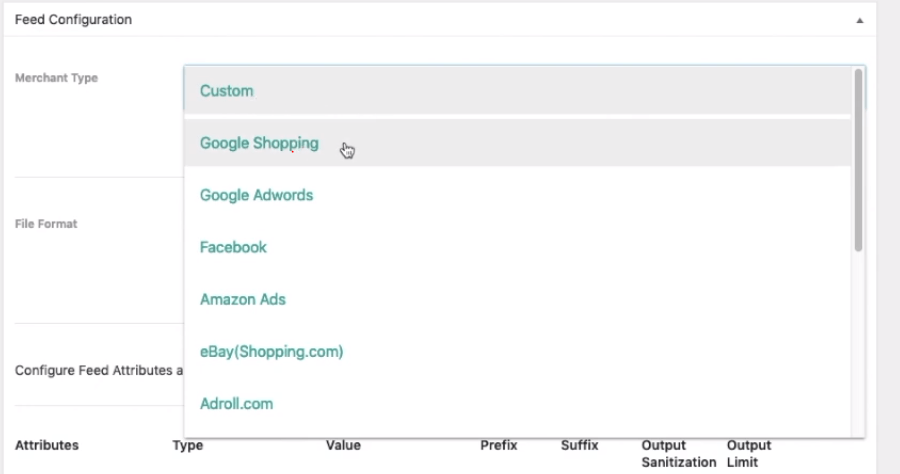
In theory – all the required fields should be populated automatically.
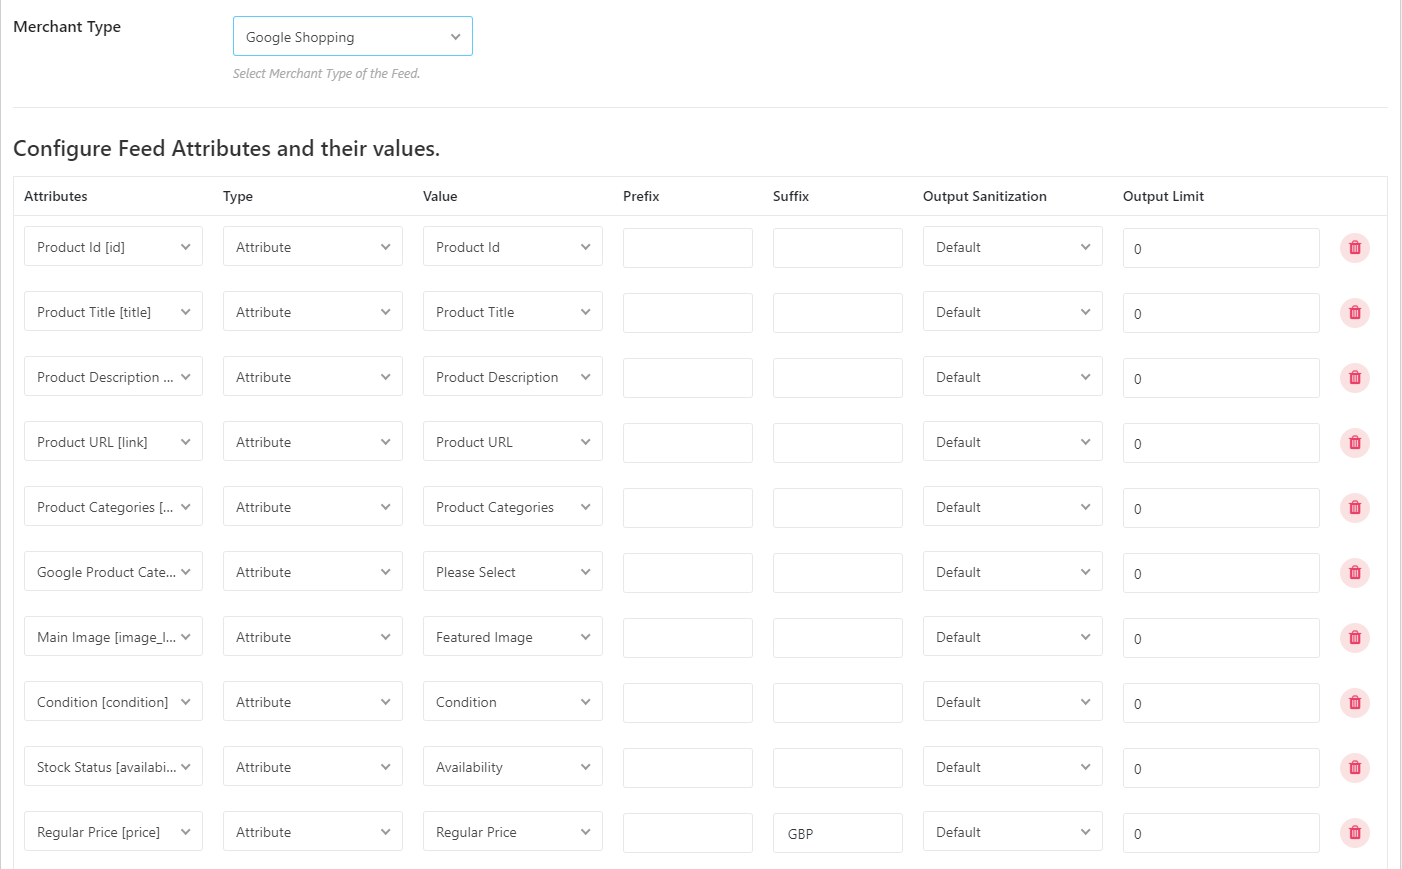
If you wish to add more details to the field, simply click “New Attribute” or “New Custom Attribute” at the bottom of the table containing all the predefined attributes.
Click the red bin/trash icon on the right of each attribute if you wish to delete one.
Once you are happy with the setup of your feed, scroll back up to the top and click “Publish” on the top right:
Once completed, the options to “View Feed” and “Download” should appear on the right hand side.
Submit Your Feed to the Google Merchant Center
On the right hand side – as well as being able to click “View Feed” – just above – you should be able to copy the feed URL.
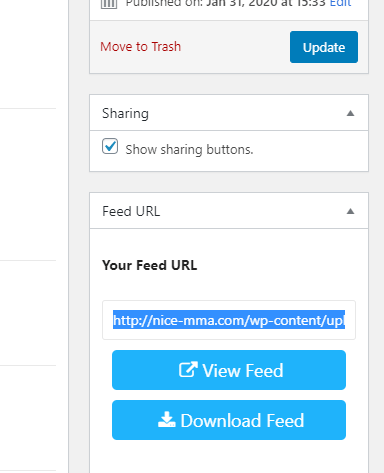
The feed URL should look something like this one for the example shop at nice-mma.com:
http://nice-mma.com/wp-content/uploads/rex-feed/feed-4651.xml
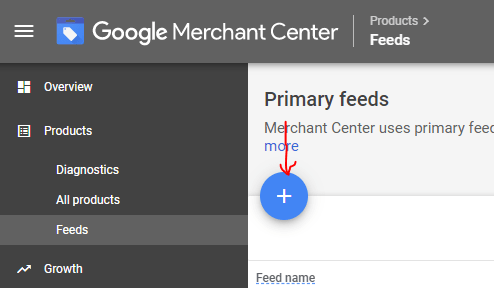
Copy the feed URL, go to Google Merchant Center, Click “Products” in the left hand menu, and then “Feeds” and click the big blue + button:
Next, you will be prompted to fill in your ‘basic information’ – select the correct options for each section, for example the country that you wish to sell and advertise in.
The click “continue” to go to the “Name and Input Method” section.
Give your feed the same name as you did in the backend of your website – “Demo1” in this example and then click the “scheduled fetch” option:
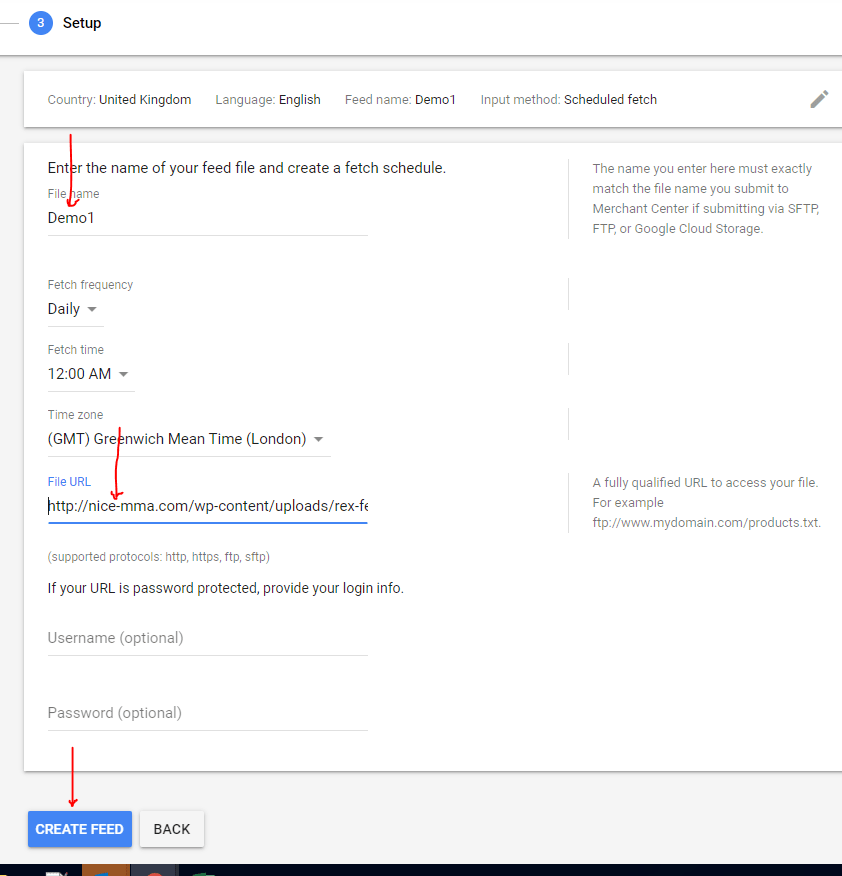
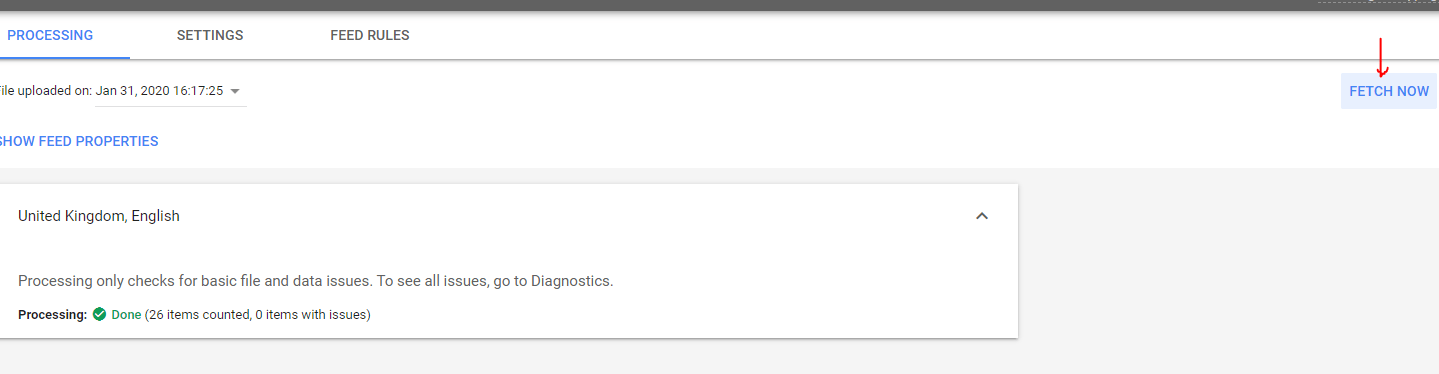
On the final page, give the feed URL a name and paste in the feed URL:
That should be everything! All you need to do now, is set up your campaign in Google Ads and then optimize your website product pages to maximise your conversions and return on ad spend.
This article is specifically about how to set up the shopping feed, however, if you want to learn how to set up shopping ads campaigns, the video below provides a very good step by step guide:
Whilst in terms of maximising your online sales, ensure each product has a clear unique selling point, backed up by some strong selling points (such as free shipping), show ‘trust metrics’ and social proofing on each page with review scores, accreditations, security icons etc and consider adding a live chat widget and chat-bot to provide quick answers to common queries about each product.